
How to Root Redmi Note 3 Snapdragon 650 [100% Working]
Earlier I have posted how to root Redmi Note 3 the MediaTek variant. Today I am going to share you how to Root Redmi Note 3 Snapdragon 650 variant which is launched in India recently. The Snapdragon 650 Variant is known as Redmi Note 3 though in India its marketed by Redmi Note 3 name. So if you own the Redmi Note 3 Snapdragon 650 variant then you can try this method to root it. In comparison to Root Redmi Note 3 Snapdragon 650 Variant is quite complex than the MediaTek variant. But don’t worry follow this step by step method and root it.
Before you Root Redmi Note 3 Snapdragon 650, make sure you know all the pros and cons of rooting an android device. Make sure you are rooting the Snapdragon variant, not the MediaTek variant.
Warning: Flashing can potentially brick or bootloop your device. We don’t hold any responsibility for any error or problem caused by following this guide. Do with your own risks. This root method for Snapdragon variant of Redmi Note 3.
Read also How to Root Redmi Note 3 MediaTek Variant
How to Root Redmi Note 3 Snapdragon 650
NOTE: Make a backup of all your data including msg, contacts files, images etc.
A. Unlock the Bootloader of Redmi Note 3
First, unlock the bootloader of Redmi Note 3
B. Download Tools
Download and install Universal ADB Driver
Download ADB FILES (Unzip it)
Download TWRP Recovery
Download BETA-SuperSU-v2.71 and moved it to your internal memory of your phone.
Download Boot images [Select according to your version of MIUI, make sure you know your ROM is Global or China and Stable or Beta.] If there are no boot images for your MIUI version then you need to make your own boot images for your MIUI version. But don’t flash wrong boot images. It will brick your device.
C. File Preparation
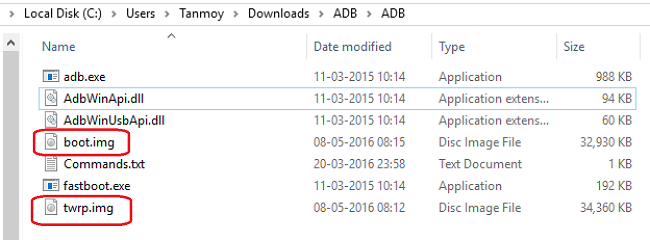
- Rename the TWRP Recovery into twrp.img and place it inside the ADB Folder.
- Rename the Boot image into boot.img and also place inside the ADB Folder.
- This will look like this.
D. Enable USB Debugging and OEM Unlock
- Enable Developer option- Goto Settings > About phone > tap MIUI version 7 times.
- Enable USB Debugging- Goto Settings > Additional settings > Developer options > USB Debugging and enable it.
- Enable OEM Unlock – Goto Settings > Additional settings > Developer options > Enable OEM Unlock.
E. Install TWRP Recovery on Redmi Note 3 Snapdragon 650
- Switch off your Redmi Note 3.
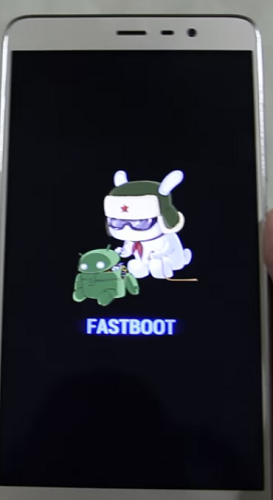
- Press and hold Volume Down+Power button together until it shows fastboot like this, once it shows release both buttons.
- Now connect your Redmi Note 3 to PC via USB cable.
- Open the ADB Folder.
- Inside the folder, hold “Shift” Key then right click and select “Open command Windows here”.
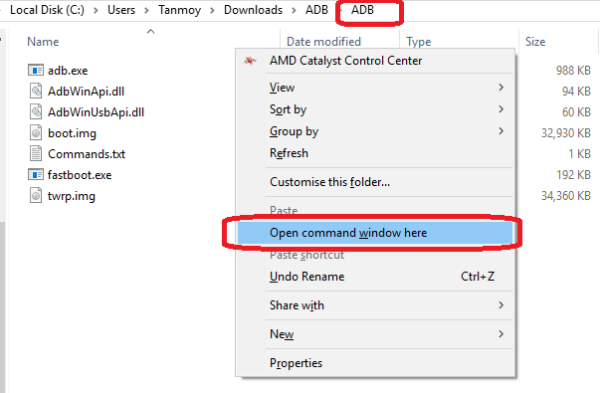
- The Command prompt will open.
- Now enter this command.
fastboot devices
- If its properly connected to your PC it will show some character like this. (If not showing then disconnect and install driver properly.)
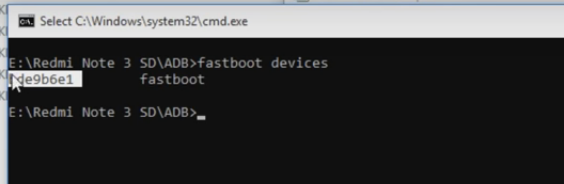
- Now run this command( Make sure boot.img file is present in the ADB folder like I have done in Step C)
fastboot flash boot boot.img
- Once the flashing has done, run this command ( Make sure twrp.img file is present in the ADB folder like I have done in Step C)
fastboot flash recovery twrp.img
- If the flashing process has done, disconnect your device but don’t switch it on, it should be in fastboot mode.
- Now press and hold Volume up + Power button together until Mi logo appears. Once the Mi logo appears, release those buttons.
- Your phone will come in TWRP Recovery mode.
- Select the language and then Swipe to allow modification then mount the storage like this.

- Now go to the main menu
- Click on Backup and make a backup of current ROM for safety. You can skip this!
- If the backup process is done again go to the main menu and tap on Install
- Then browse the BETA-SuperSU-v2.71-20160331103524.zip and swipe to Install
- Once the flashing process has done, tap on Reboot System
- Your device will reboot and it rooted now.
- Install Root Checker and whether Redmi Note 3 Snapdragon 650 rooted or not.
Rooting Redmi Note 3 Snapdragon 650 is lengthy as I previously said. The lengthy part is unlocking bootloader and sometimes it takes a long time. By the way hope you have clear idea how to Root Redmi Note 3 Snapdragon 650 variant.
Incoming Search:
Working method to Root Redmi Note 3 Snapdragon 650
Easy way to Root Redmi Note 3 Snapdragon 650
How can I Root Redmi Note 3 Snapdragon 650 variant
Rooting method of Redmi Note 3 Snapdragon 650


will it work correctly for MIUI 7.2.5.0 STABLE with installed lollipop5.1.1
please reply I want to root my redmi note 3 (Snapdragon varient)
There is boot image for 7.2.5.0 Global Stable, mean you need to make your own boot image from this guide http://en.miui.com/thread-249666-1-1.html. First make your own boot image and follow this guide.
What is mean of flash SuperSU
Flashing SuperSu means installing SuperSu.zip through TWRP Recovery.
What is boot image of 7.3. stable
There is boot image for 7.3 Global Stable, mean you need to make your own boot image from this guide http://en.miui.com/thread-249666-1-1.html. First, make your own boot image then try.
this work for kate version?
What do you mean by Kate version?
Is there any need to flash boot.img before flashing twrp.img? I only wanna install twrp.img
Yes flash boot.img first then TWRP. Follow the E. 9 and E.10 steps
Thanks for the guide man. 100% working!
Will it work in miui 8?
I have not tested…. do at your own risk.!!