How to Use VLC as Screen Recorder in Windows 10 PC
I have seen on YouTube that many people use free software to record screen. But the main problem with those free screen recorder is the promotional watermark on the video. This makes pretty bad. But if you are using Windows 10 PC then you don’t need any screen recorder software. If you have VLC media player installed on your Windows 10 PC then you can use it as a screen recorder software. Today I am going to share you how to use VLC as a screen recorder in Windows 10 PC. I repeat its for Windows 10.
![]()
So let’s begin. First of all, you need a VLC media player installed on your Windows 10 PC, which is quite normal. In case you don’t have VLC then download and installed it.
Here is the step by step method to record screen using VLC in Windows 10 PC
- Run VLC
- Click the Media menu and then click Convert/ Save.. option.
- Now click on Capture Device tab
- Now select Capture Mode >> Desktop
- Change the Desired frame rate for the capture to minimum 15 f/s
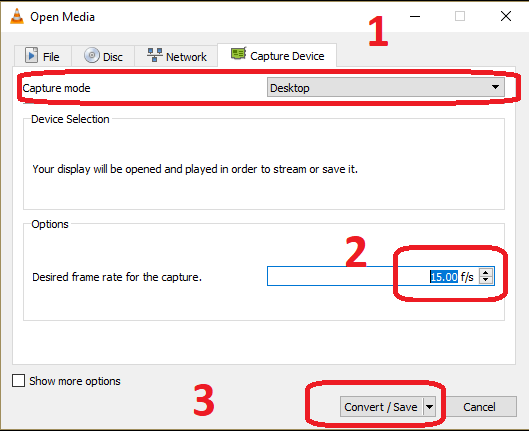
- Now click on Convert/Save
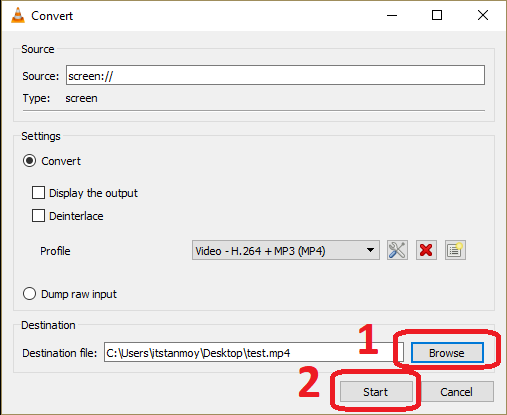
- Now browse Destination File location and then put a name for file and click on save
- Finally hit Start button on the dialogue box to start the screen recording
- It will start recording your screen on Windows 10.
- You can pause and resume the recording by hitting the pause/play button on VLC.
- To complete the screen recording process click on STOP button on VLC
The screen recording file will be saved in Mp4 format in the desired destination folder. So now you don’t need any other screen recording software if you are on Windows 10. Hope you will like this tricks.